Magnifier
Here are the steps to use the magnifier on a public computer.
1. Find the Accessibility folder on the desktop, open it and click on the Magnifier.
2. This will start the Magnifier on the computer.
You can also use the keyboard shortcut Windows logo key + Plus sign (+) to quickly turn on the Magnifier.
3. The Magnifier tool (pictured below) will show up on the screen.

4. Click the Plus sign (+) to increase the magnification of the page.
You can also press the Windows logo key + Plus (+) or Minus (-) to zoom in and out.
Change Your View:
You can change your magnifier view by pressing Ctrl + Alt + M, which will cycle through full screen mode, a floating transparent magnifying glass, or docked.
5. Press the Play Button to start reading all content on the page from the current cursor location.
You can also press Ctrl + Alt + Enter key sequence to start the reader from the current cursor location. This same keyboard shortcut will pause and resume reading.
To stop the reading, press any key.
6. Click on the Read from here button to highlight an area of the page to start reading from.
Narrator
Here are the steps to use the narrator on a public computer.
Narrator reads and interacts with items on the screen, including text and buttons. Use Narrator to read email, browse the internet, and work with documents.
1. Find the Accessibility folder on the desktop, open it and click on the Narrator link.
2. This will start Narrator on the computer.
You can also use the keyboard shortcut Windows logo key + Ctrl + Enter to turn on Narrator.
3. To stop Narrator from reading at any time, press the Ctrl key.
4. Once Narrator is turned on, it will start to read the words on the web page or document that you have open.
5. Use the Tab or arrow keys to move around the page or app. This will allow you to move between interactive controls like checkboxes, buttons and links, as well as different paragraphs.
6. Press Enter or Spacebar to activate an item that you want to use, such as a button in an app, a link in a webpage, or a text box.
7. To switch between open windows on your computer, hold down the Alt key and then press the Tab key.
On-Screen Keyboard
Windows has a built-in tool called the on-screen keyboard that can be used instead of a physical keyboard. Here are the steps to use the on-screen keyboard on a public computer.
1. Find the Accessibility folder on the desktop, open it and click on the on-screen keyboard link.
2. This will open the on-screen keyboard on the computer.
You can also use the keyboard shortcut Windows logo key + Ctrl + O to quickly turn on and off the on-screen keyboard.

3. With the on-screen keyboard open, select the Options key and pick what options you want the keyboard to use.
Click Sounds: Use this option if you want to hear a sound when you press a key.
Show keys to make it easier to move around the screen. Use this option if you want the keys to light up as you type.
Turn on numeric keypad. Use this option to expand the on-screen keyboard to show a numeric keypad.
Hover over keys. Use this mode if you use a mouse to point to a key. The characters you point to are entered automatically.
Use Text Prediction. Use this option if you want the on-screen keyboard to suggest words for you as you type so you don’t need to type each complete word.
VZ-R Document Camera (Port Angeles Main Library)
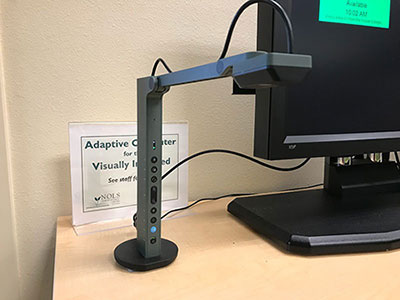
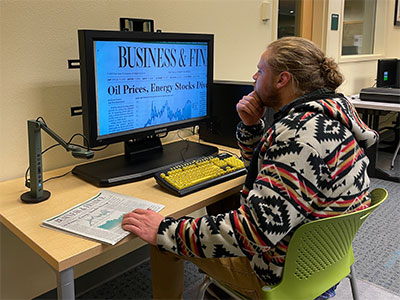
Here are the steps to use the document camera on the ADA public computer at the Port Angeles Main Library. The camera is an image-capturing device used to increase the size of documents, textbooks, artwork, devices, 3D objects and more.


1. At the ADA computer station in the Port Angeles Main Library, switch the HDMI input on the monitor to HDMI 2. This will allow the document camera to show up on the monitor.
2. Place the document, picture, or object directly underneath the document camera.
3. The camera will show a display of the document, image, or object on the monitor.
4. Use the buttons on the document camera to easily:
- Zoom in and out
- Focus the image
- Apply background filters
- Rotate the image
- Adjust image exposure for improved clarity
- Turn on the light for dark environments
- High contrast setting, use a dark background and light (yellow) text.

